Install Creator by Clickteam
Get this amazing program for Free! Here: Clickteam.com
So now you can creator an installation file for your mod or game without any coding! Just use the Install Creator 2 Program! It is very easy to use! I have created a video showing me creating the latest version of Jedi Knight Remastered v2.0 which will be out soon! I created a video going through this on YouTube. However, if you rather have a read tutorial please keep reading and I will walk you through how to use this amazing program!
How to create an installer with Install Creator?
- Launch Install Creator
- Click Next on Welcome Screen
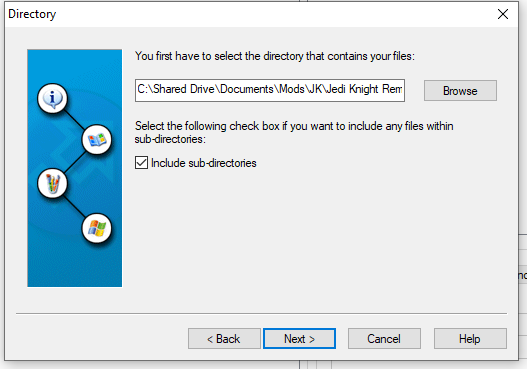
- Browse to the Folder that has all your Mod or Game files are and make sure to check the "Include Sub-directories" and Click Next
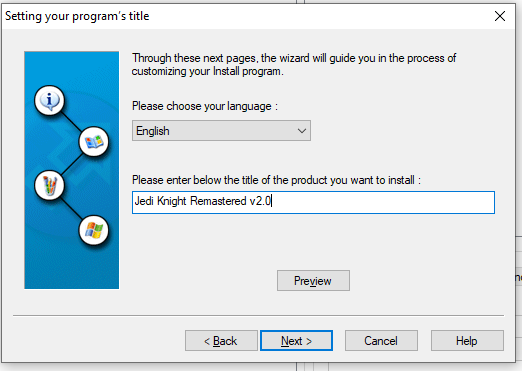
- Select Language of installer and fill out the title of the Game or Mod & Click Next
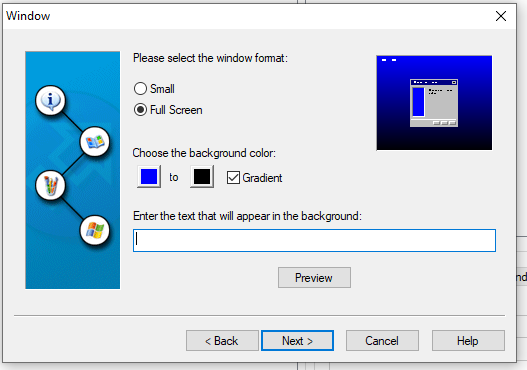
- This next menu you can choose a full screen installation or a Small window installation. So what every you Prefer here. For mine I did Full Screen and you can have Text at the top but since I going to be using a background image it will already have the title in it so I prefer not to have a title.
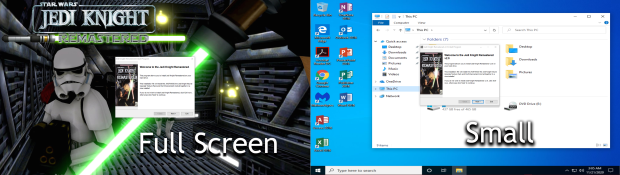
- Below shows the difference between Full Screen and doing a small screen:
- Next if you choose full screen you have the option to add a Background Image. The Image Must be a .BMP Image. So get a image created in Photoshop or some other image editing software and save it as a .BMP file. The you can browse and add it here and then click next.
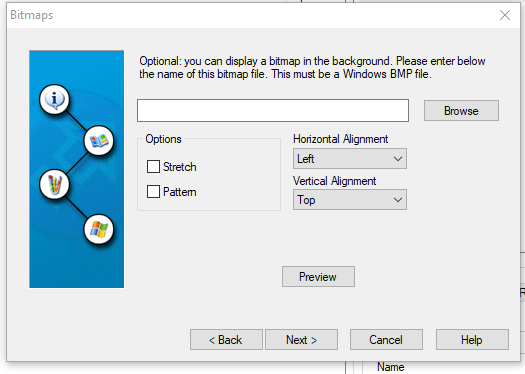
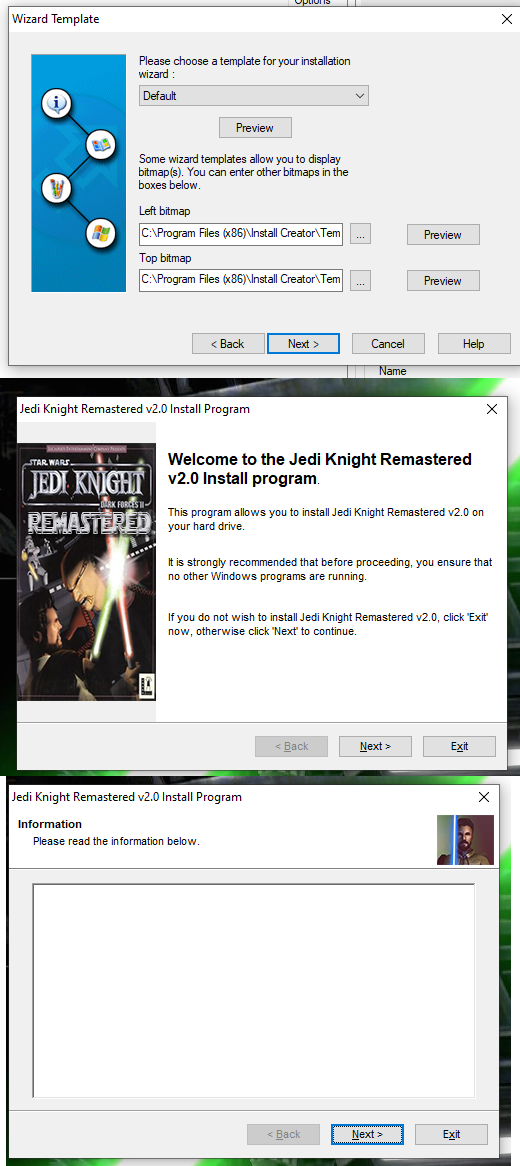
- Now you can change the side image and the upper small image of the installer. These files must also be .bmp files. Recommend size for the Left one is and image at 140 x 316 can be bigger or smaller as long as you lock the dimensions to change at the same time. Ex the other sample image is 96 x 240. I ended up going with 140 x 258 and it looked good so just experiment with your image and see what size works best. There is a handy preview button on each page of the wizard so you can test how it looks after adding the image! The smaller Image for the Top is about a size of a Icon 57 x 50. Once satisfied click Next:
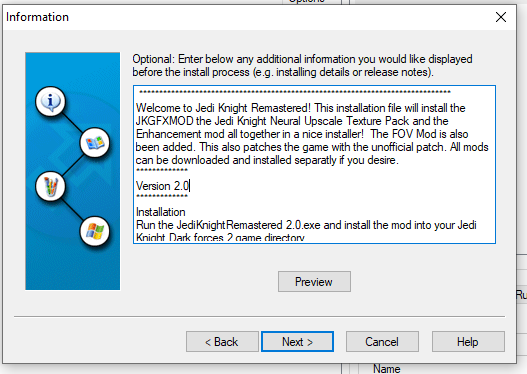
- This screen is optional its just additional information about the Game etc. I put in the readme File here for the Mod. It just explains all about what the mod is etc.
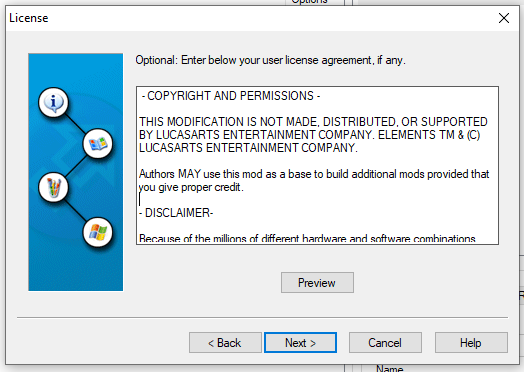
- Next you have the License agreement info. Once filled out click next
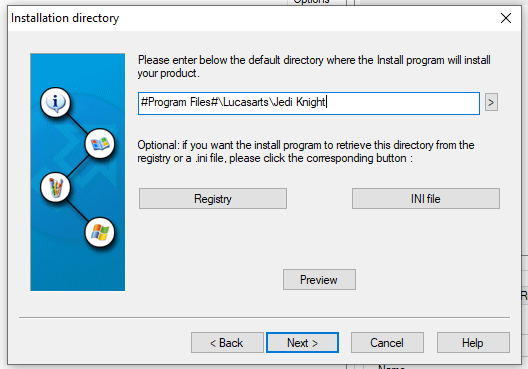
- Now you enter the installation location. For me that would be the Star Wars Jedi Knight Directory and I want to be able to let the User change this since there are more than one location this folder could be for users. You have the option of allowing the registry add this folder for you if you need to.
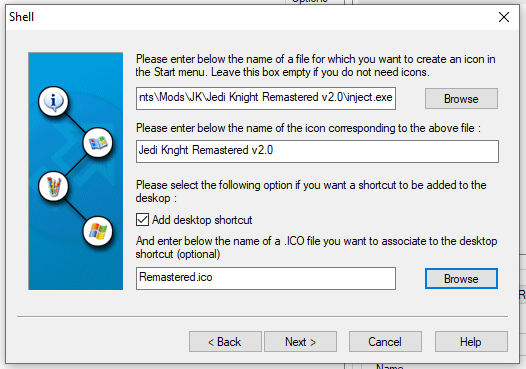
- Now you can create a shortcut for the main file that will be running the game or Mod. You can add shortcuts to the Desktop and the Start Menu. If you need more than one shortcut don't worry we will do that later for other files but this is just for the main file.
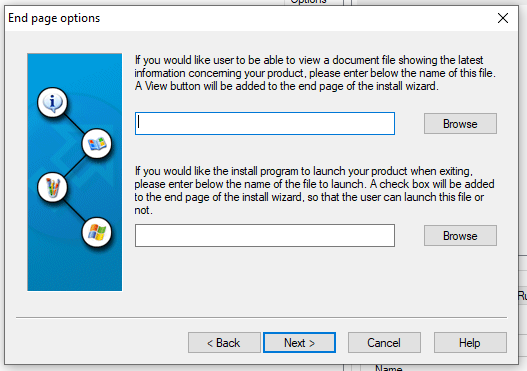
- Next you can have a file auto Launch, like a readme or guide etc. and you can also setup the main exe file to launch automatically when the installer exists. It will also add check boxes so the users can decided if they want it to launch right away. Of course this feature is optional.
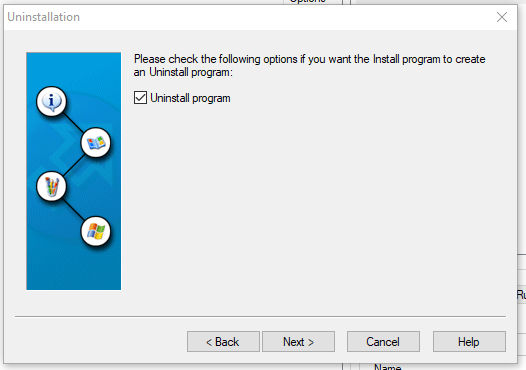
- This will add the uninstall feature if needed.
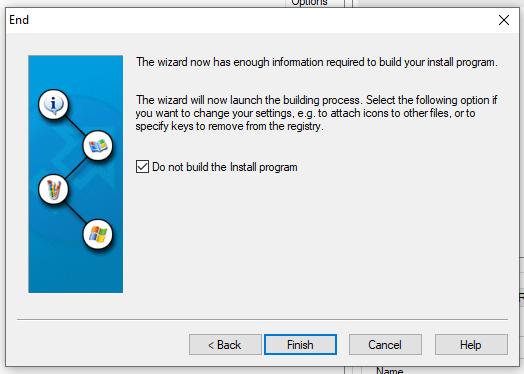
- Now we have reached the end of the setup wizard and it will ask if you want to build the installer now! Of course if you are satisfied and just needed a basic installation you can go ahead and build it and test. However, now that the wizard is done there is plenty more you can customize and create with this Install Creator.
- Ok now we are in the actual front page of the installer! There are lots of options to explore and probably a lot I have not explored yet myself! I will walk you through the options I have used and then from there you can explore the rest!
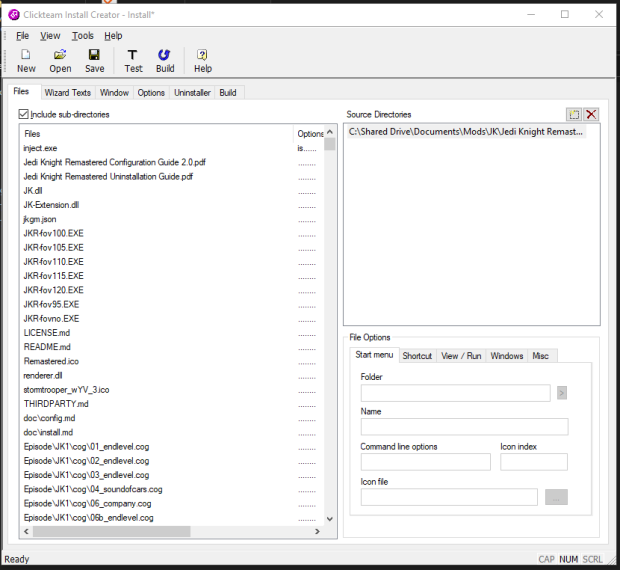
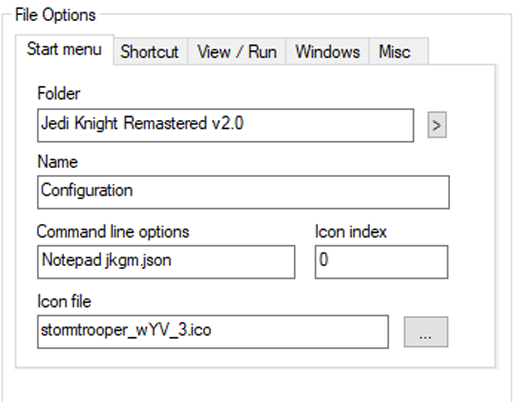
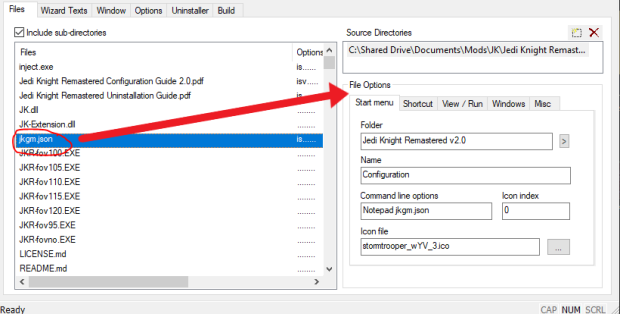
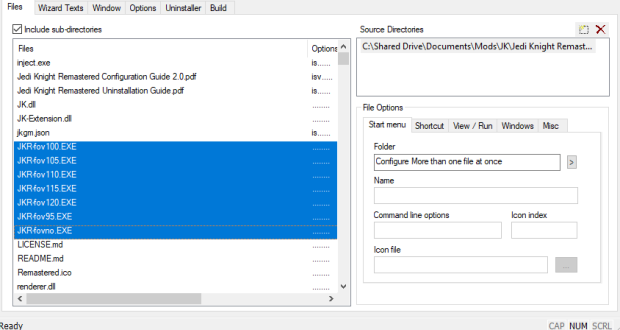
- So for my installer I wanted to create more shortcuts for other files I had in my installation! To do this you select the file that you want to create a shortcut for and on the bottom right you have the File options tab! The first Options tab is the Start Menu Shortcut. Here you can input the folder it will create in the start menu, the name of the shortcut, the Icon and you can even make it input command Line options into the installer. For example one of the files I make a shortcut for, must be opened with notepad so I added the CMD line to open it in Notepad!
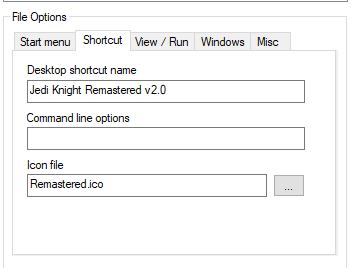
- Next option is the Desktop shortcut.
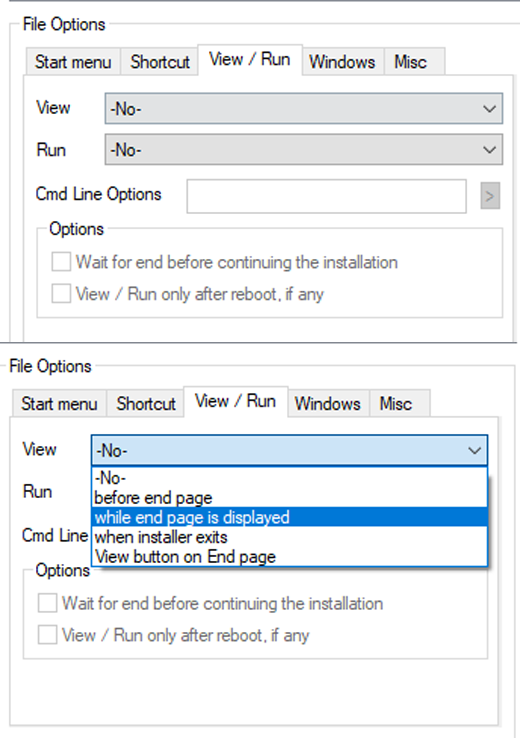
- Next tab is the View / Run. In this tab you can make the file auto run or view after exiting the installer, before the end of the page, while end page is displayed or when a view / run button has been pressed. This can be handy if there is a readme or configuration file that needs to be read before the Mod / Game can be ran.
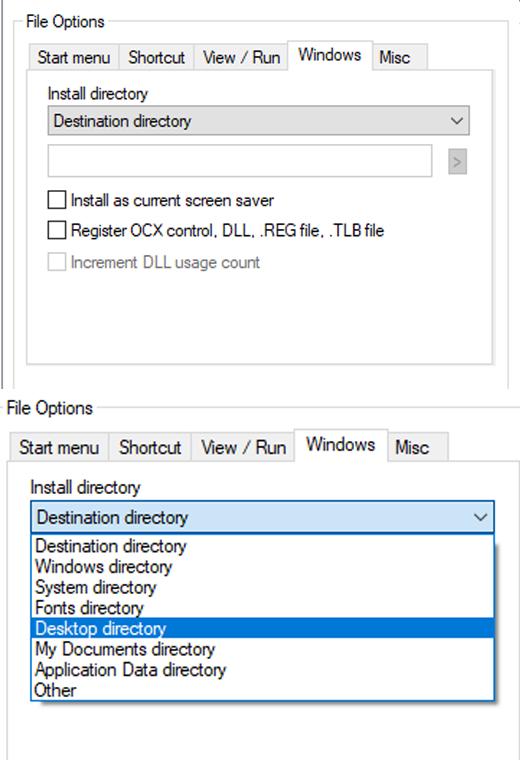
- The next tab is for files that need to be installed in other locations not the main directory. Windows tab allows you to send certain files to other locations on the computer.
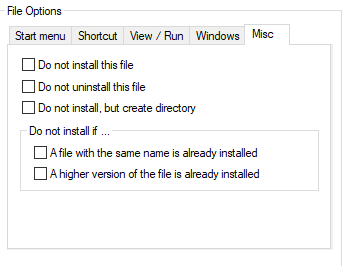
- The Last tab Misc lets you decide certain options for the file. Like if the file is to not be installed, Not uninstalled, Not installed but create directory and also with conditions like file already exists or if there is a higher version of the file it will not install. This can be handy if there is 1 file that needs these conditions. For example some dll files must stay even after the mod is uninstalled.
- So to do these options for a file you just need to select it in the file menu and then from there cycle through what options are needed. If you have more than one file that needs the same configuration you can select them all at once before configuring.
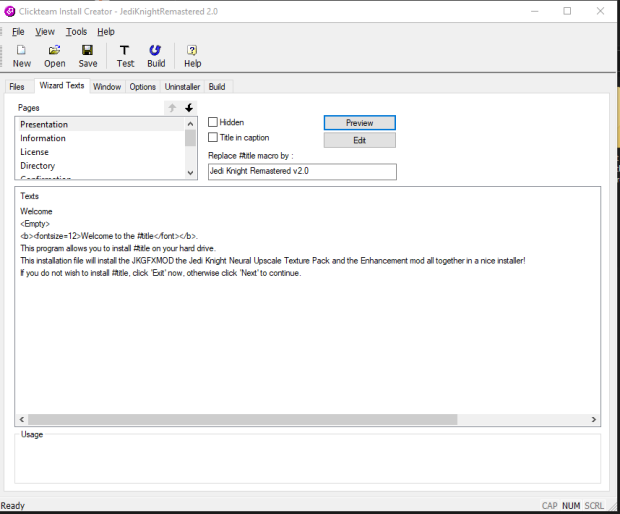
- Next we move onto the Wizard Text tab! From here you can edit each of the installation menu Text! Change it! Make it your own! Some of these menus have been filled in the setup wizard but others have been untouched! So feel free to change what ever menu you want! Under pages select the page you want to edit and use the Text box to edit the page. From there you can use the slider to cycle through select the next page and edit accordingly. Be sure to use the Preview button to see how it looks!
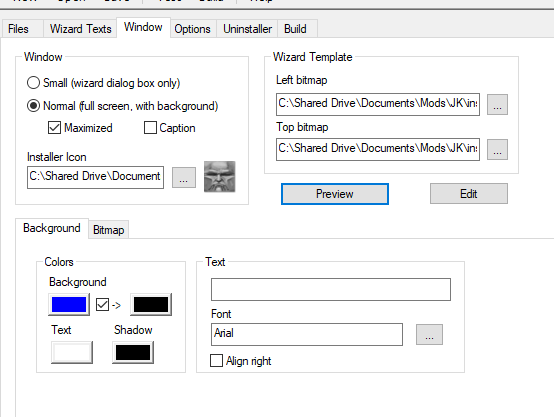
- Next the window tab is where you can change what the window looks like again! Full screen or small and you can change the Left and Top images again as well!
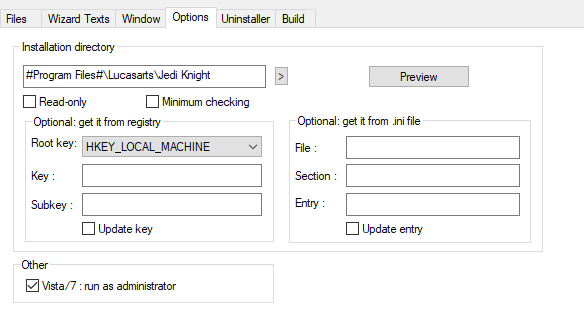
- The options tab is where you can edit the Installation directory again! As well as add Registry entries to grab the installation location from an INI file etc.
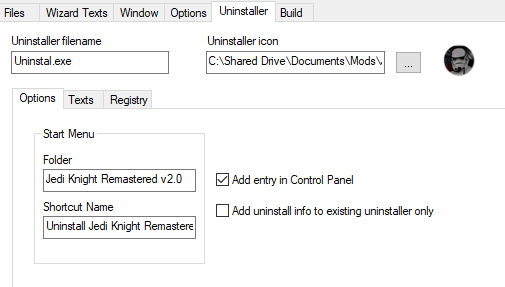
- The uninstaller tab allows you to customize the uninstaller by adding an Icon, Start Menu Shortcut, Texts and even commands to remove registry entries as needed.
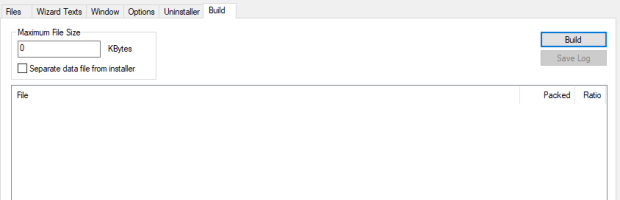
- Last but not least the build tab is where you can build the installer! Once you have customized your installation file you can build her with this tab and then test her out! I am sure there is probably a lot more features I have not used yet but this is a very easy fast and clean .exe creator software!
Conclusion
In conclusion if you are looking for an easy to use Installer Creator then Install Creator 2 is for sure the right way to go! Not only is it free to use, it is simply the easies, customizable installer out there! For Modders and game developers you may not like this since it is so simple but for those who are beginners to modding and game development this is a game changer! Thanks guys for reading and happy developing!